
Introduction:
If you’re looking to enhance your WordPress website’s performance and efficiency, optimizing your images and database is a crucial step. Nevertheless, we say it’s the first step.
At the end of the article, you’ll find a bonus optimization tip for WooCommerce.
The importance of Image Optimization
So why is the image optimization so important? Let’s see:
- Google pagespeed complains as loud as possible about the slightest optimization in regard of every image on a webpage: the size, the format (they expect the images to be served in webp format), the lack of width and height attributes (which lead to increased CLS – layout shift)
- Compressed images are smaller in size which will be served faster, rendered faster and lead to smaller overall page size
- Webp format is a modern format for the web, with better compression, no losses, faster to load
The Importance of Database Optimization
Without getting into the technicals, the faster the database is, the quicker the server will reply to the browser, the faster will be the loading of the webpage. And yes, there will be database queries even with caching.
Overall, the database optimization cleans unused data, optimizes the database structure and reduces its size.
In this guide, we’ll show you how to achieve this using the WP-Optimize plugin. You may wonder why WP-Optimize when there are dozens of plugins doing image optimization and/or database optimization.
From our testing, it does the best job without breaking something. Plus, if you don’t continue to add images on the website, you can optimize everything and delete the plugin, so you won’t have to maintain and update it. And everything will still be optimized, including the image loading in webp format (which won’t work with other plugins if you remove them). So let’s get started!
Easy Step 1: Install and Activate WP-Optimize
- Log in to your WordPress admin panel.
- In the left sidebar, click on “Plugins” and then “Add New.”
- Search for “WP-Optimize.”
- Click “Install Now” and then “Activate.”
Step 2: Database Optimization
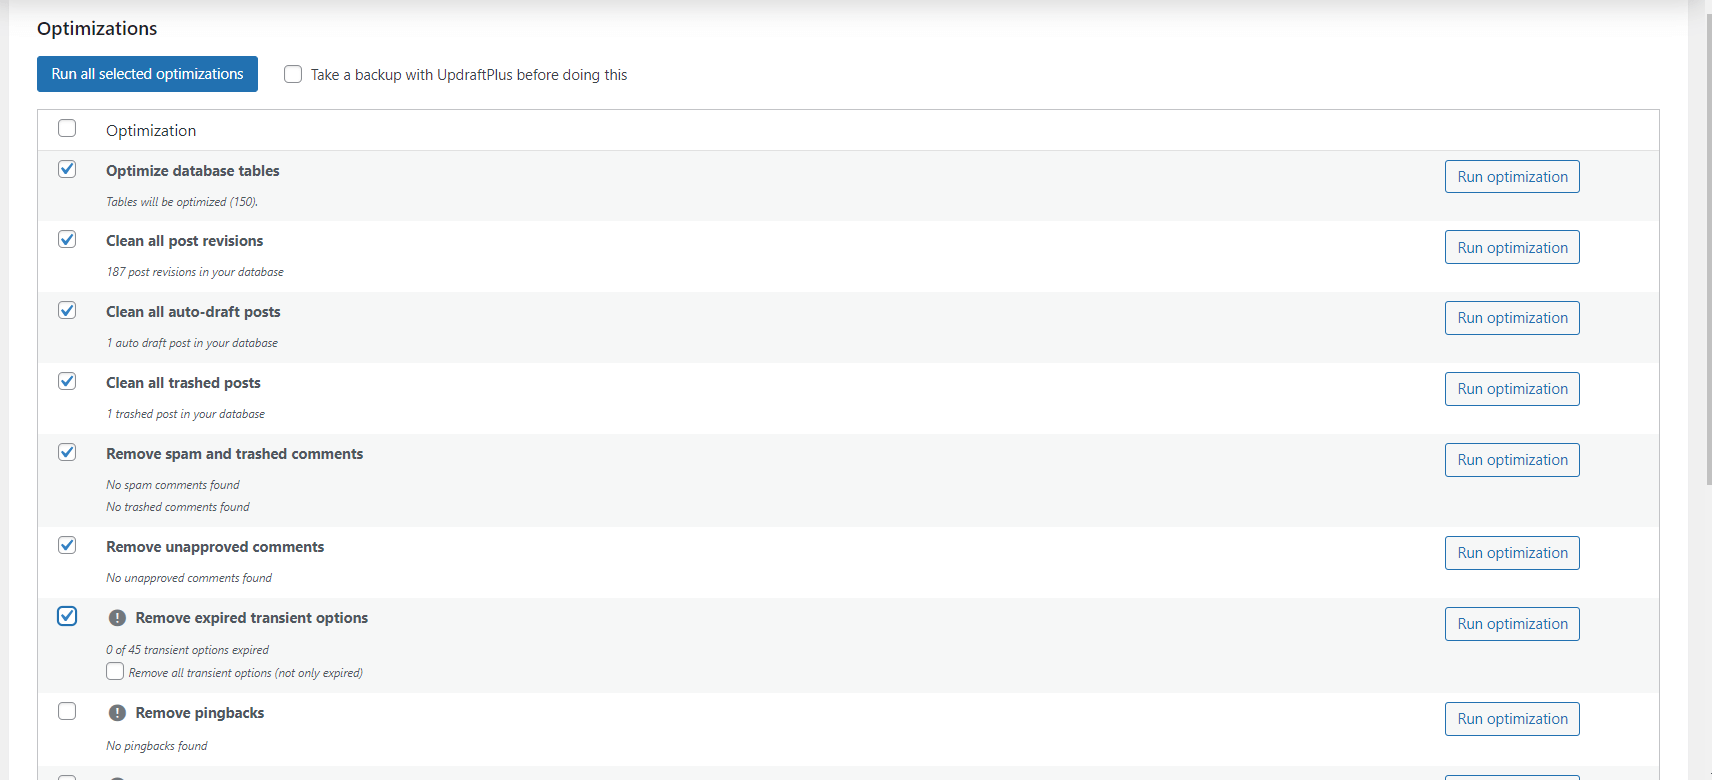
- In the “WP-Optimize” menu, click on the “Database” sub-menu.
- WP-Optimize will display a list of items you can clean up:
- Post Revisions: These are versions of your posts saved in the database. Click “Clean” to remove old revisions.
- Drafts: Click “Clean” to delete drafts.
- Auto Drafts: Clean up these automatically saved drafts.
- Transients: These are temporary data stored in your database. Removing them can free up space.
- Tables: Select all or specific tables you want to optimize.
- Comments: You can remove spam and trash comments.
- After selecting the items you want to optimize, click “Run Optimization.” We recommend doing a database backup before proceeding with this step. The easiest way to do a backup (if you are non-technical), install UpdraftPlus plugin (https://wordpress.org/plugins/updraftplus) and perform a database backup only. If something goes wrong, this plugins have the functionality to restore that backup just by pressing a button.
This step will take several minutes, depending on the size of the website. Just let it do its thing and wait until it finishes.
Step 3: Image Optimization
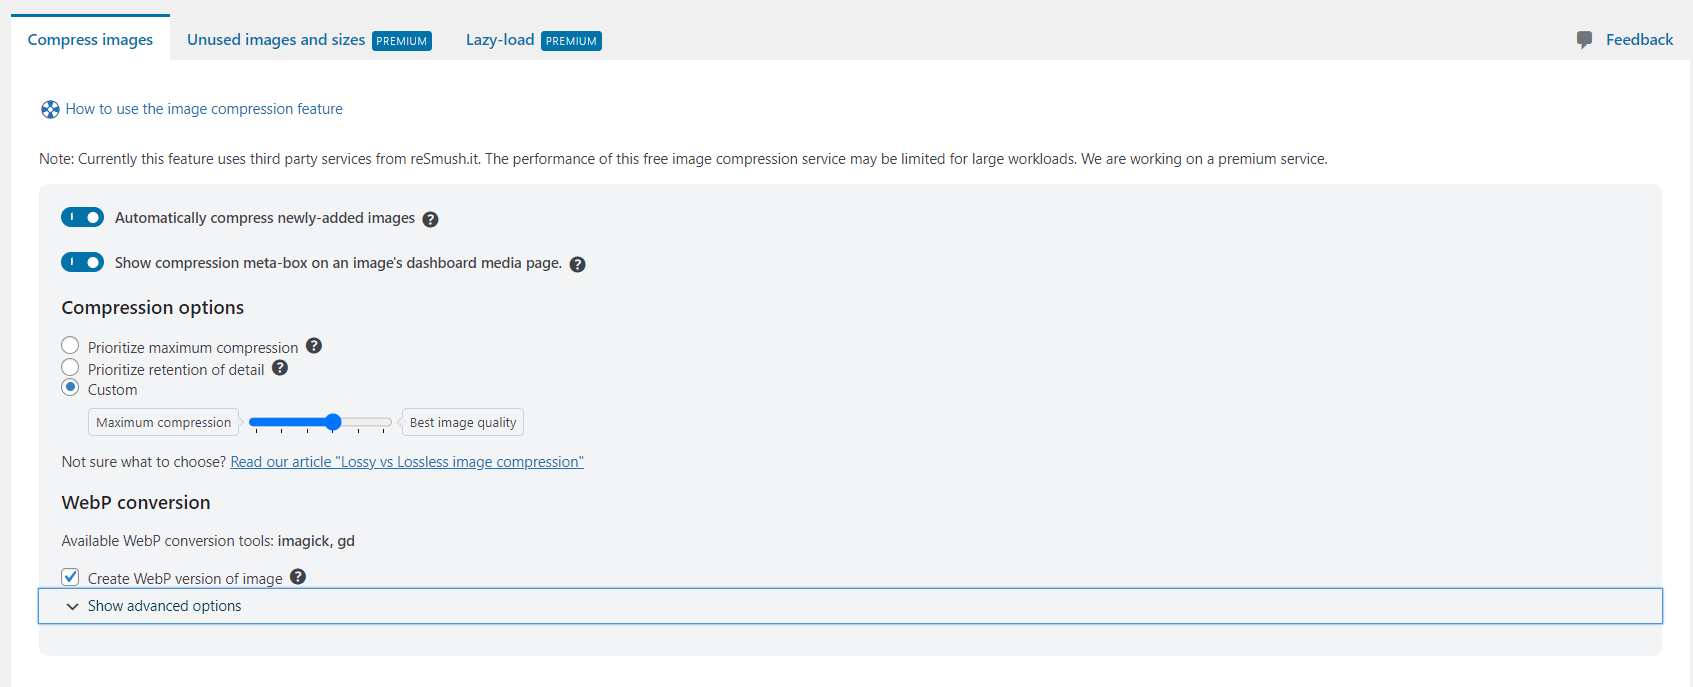
- In the “WP-Optimize” menu, click on the “Images” sub-menu.
- You should check “Automatically compress newly-added images” if you continuously add images on the website
- You can go for a medium compression, between “lossy” or “lossless”
- You should absolutely check “Create WebP version of image”
- Select all the images found in the list and bulk compress them.
This process will take some time, depending on the number of images to be optimized.
The key factor with the webp delivery in the browser, is that there are some .htaccess rules that need to be added. And the rules added by WP-Optimize never broke any website from our testing, and we can’t say the same about other similar plugins. More than this, if you delete the plugin, those rules will remain in the .htaccess file so the web images will still be served afterward.
Step 4: WooCommerce database optimization
Starting with version 8.2, WooCommerce introduced the stable version of High-Performance Order Storage, a feature meant to optimize database usage by WooCommerce. To find the setting, go to WooCommerce > Settings > Advanced > Features.
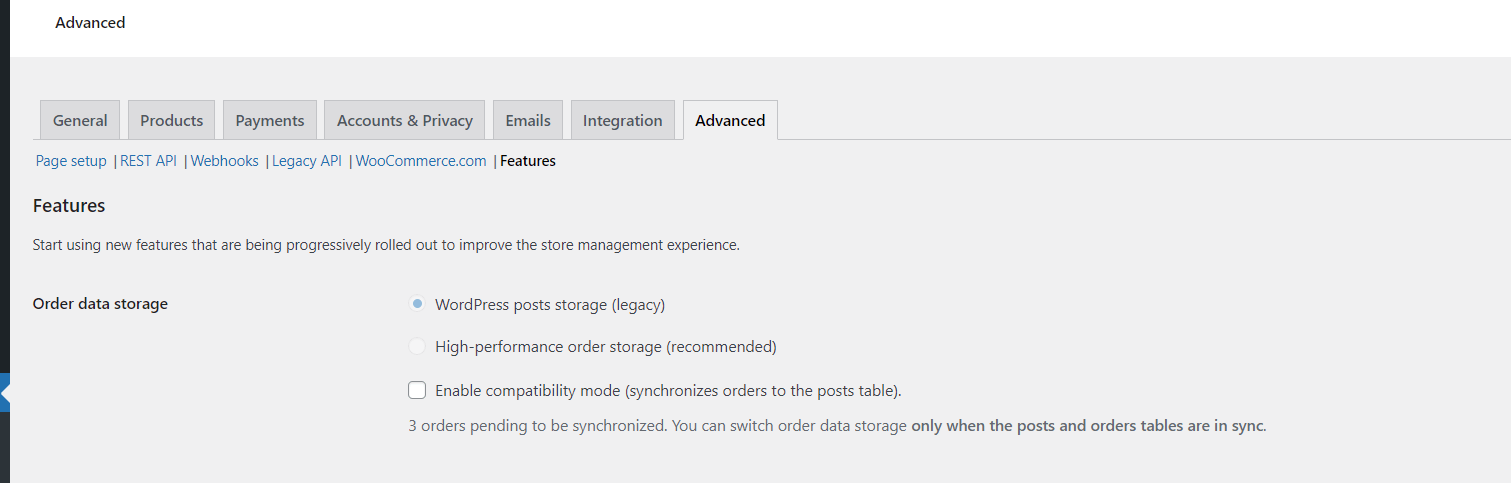
If you don’t have the feature, probably you have to update the plugin. Also, if you already have data stored in the database, the option will be disabled and you’ll have to Enable compatibility mode first, which will start the syncing process. After the sync is finished (refresh the page to check it), you can enable it.
Conclusion:
By following this guide, you’ll optimize your WordPress website’s images and database, ultimately improving its speed, user experience, and overall performance. With WP-Optimize, you can keep your site running efficiently with minimal effort. Happy optimizing!