
Introduction:
Welcome to the fast lane! In this guide, we’ll unravel the secrets of Autoptimize, your ticket to a high-speed, high-performance website. Buckle up as we optimize every nook and cranny to ensure your visitors experience the digital equivalent of a smooth ride in a luxury car.
Autoptimize is perfect for optimizing CSS, JS, and HTML which affects core web vitals. Now, that in the previous step we optimized the asset loading and removed the unused assets, it’s time to optimize the loading of the remaining assets. As a side note, Autoptimize has over 1 million active installs, just for the record.
Step 1: Install and Activate Autoptimize (obviously)
The first pit stop is straightforward. Head to your WordPress dashboard, navigate to Plugins, and hit that ‘Add New’ button. Search for Autoptimize, install, and activate. Your website is now ready for a speed boost.
Step 2: JS, CSS, & HTML tab
2.1 Javascript options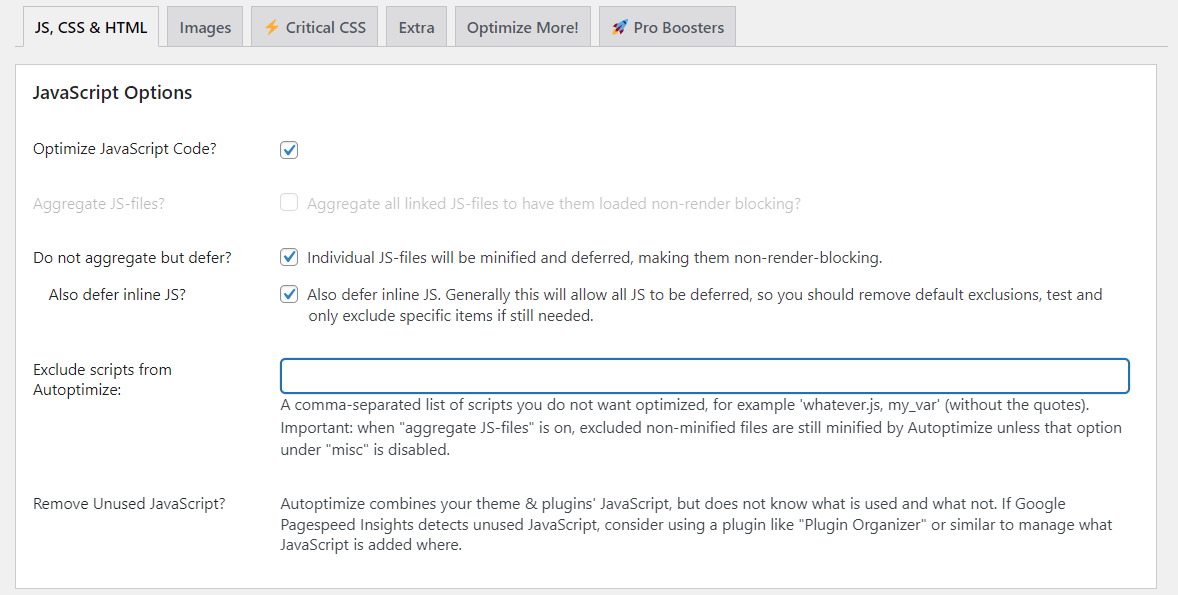
– Optimize JS code: will minify the JS files
– Aggregate JS-files: it’s not a good practice anymore for some time, it just leads to a huge JS file that will take a long time to load and parse; nowadays with HTTP/2 servers, parallel downloads are possible and it’s faster in this way, since multiple JS files will load and parse in the same time
– Do not aggregate but defer: this leads to parsing the JS files while the HTML is loaded, without causing render-blocking
– Exclude scripts from Autoptimize: if you see errors, find the problematic JS files in the browser’s console and add them here
2.2 CSS Options
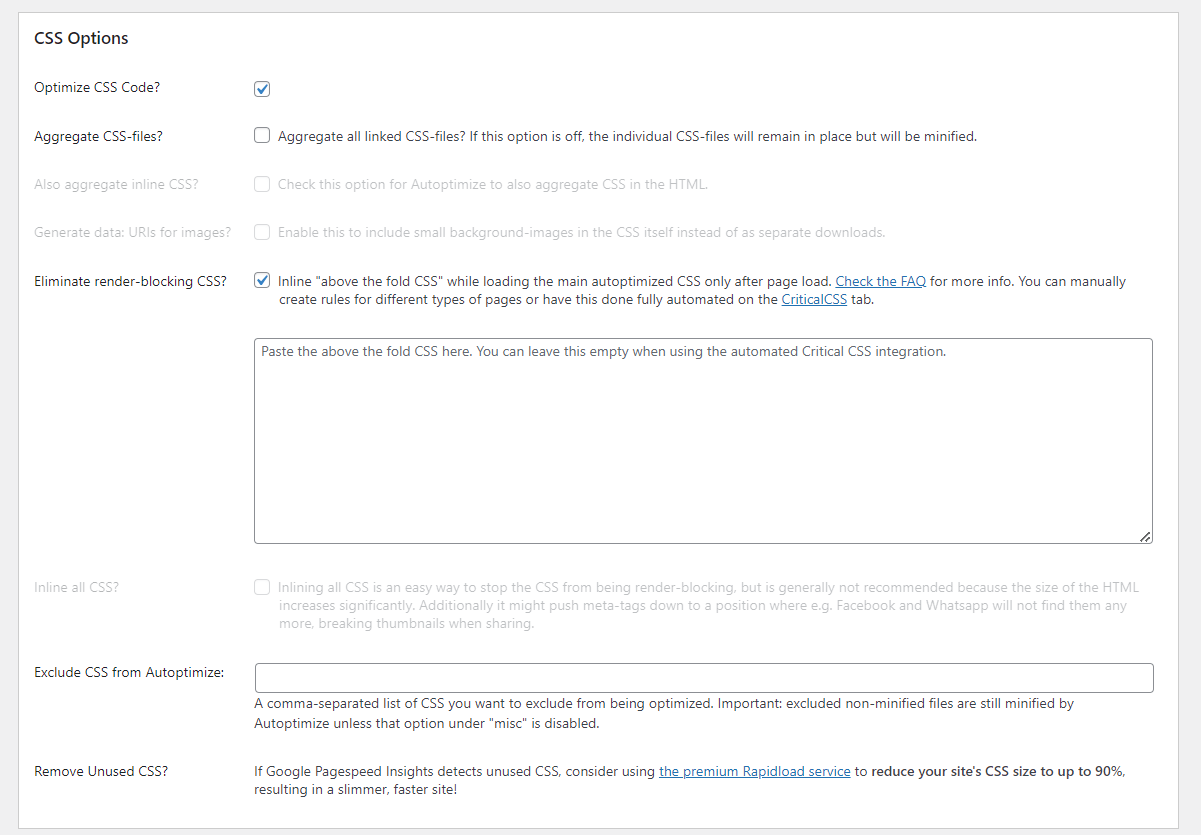
– Explanations same as to the JS options
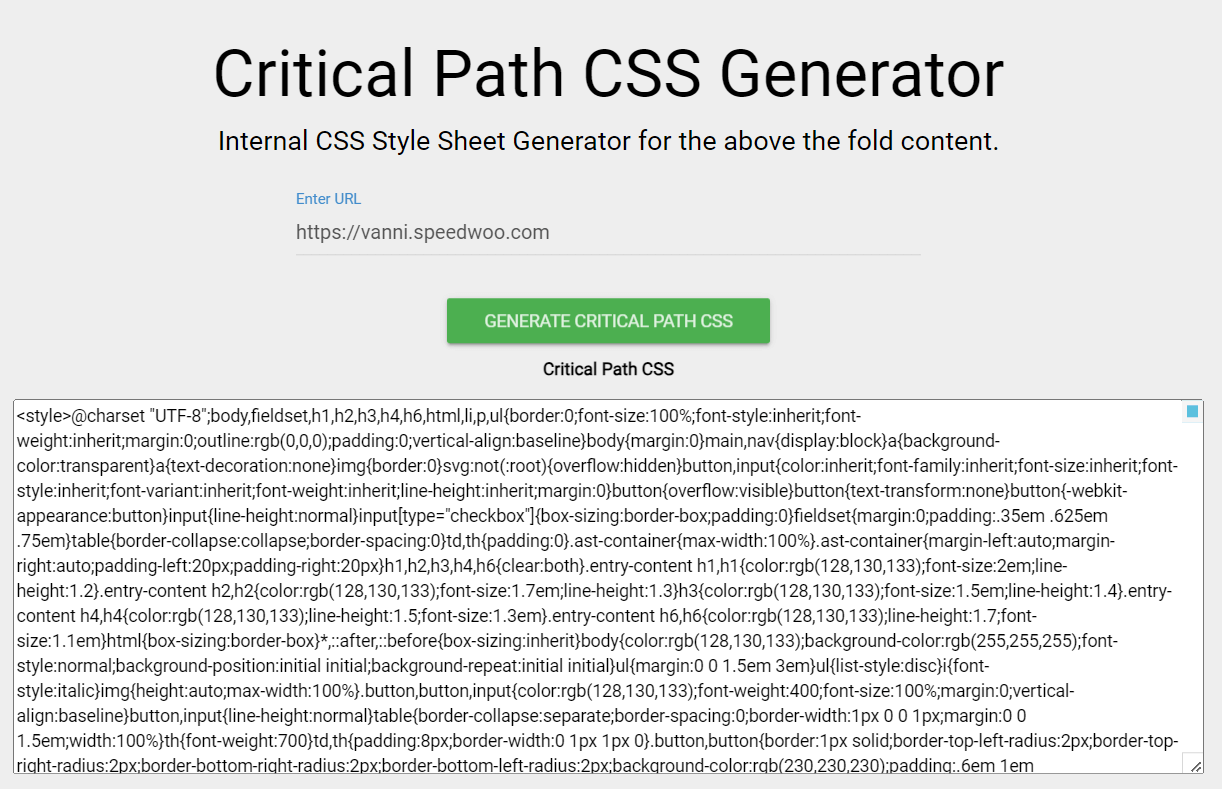
– Eliminate render-blocking CSS: use a free critical path CSS generator, like this one and paste the generated code in this section
2.3 HTML Options

– Optimize HTML code: will strip empty spaces from HTML, which will make the page smaller; but on some websites it can break the layout so test it thoroughly
2.4 Misc Options

– Disable extra compatibility logic: if you encounter errors throughout the website, check if disabling this option will fix them
– Also optimize shop cart/ checkout: if you encounter errors on those pages, disabling this option should fix them
Step 3: Critical CSS tab
In this section, you can add manual rules for the critical CSS.
Also, with a criticalcss.com paid subscription, you can add your API key in this section and Autoptimize will automatically add the generated critical CSS rules.
More than that, the Autoptimize Pro version, will do this without the use of an external tool.
Step 4: Extra tab
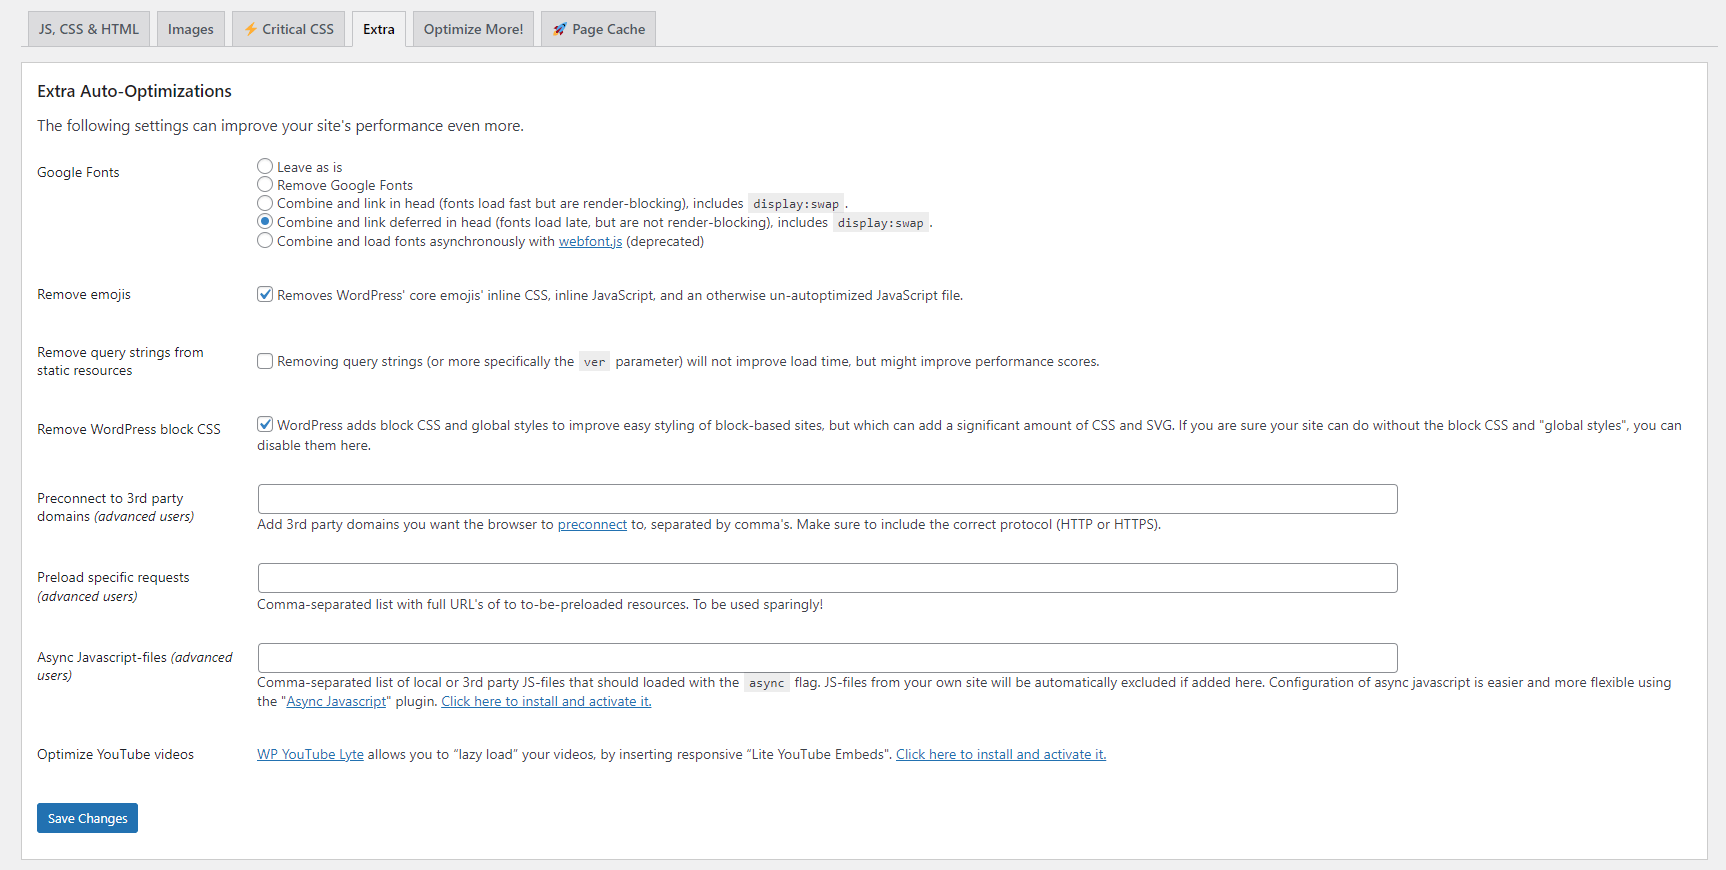
– Remove WordPress block CSS: if you use Gutenberg blocks and you see that this option breaks the layout, you should disable it and test if this is the cause
Step 5: Images tab

– Lazy-load from nth image: you can start with 1 and if there are pages where the first image(s) don’t load, you can put 2 or 3 in that field, depending on how many images you have above the fold (banner image, maybe also the logo doesn’t load although most of the times the logo is not lazy-loaded).
Conclusion: Feel the Need for Speed
Congratulations! Your website is now finely tuned with Autoptimize. Remember, speed isn’t just about load times; it’s about enhancing user experience and driving conversions. Shift into high gear and enjoy the faster, sleeker, and more efficient website you’ve created.
Happy optimizing!
#PerformanceOptimization #WebsiteOptimization #WebsiteSpeed #DigitalPerformance